How To Fix: External Disk Drive Suddenly Became RAW
DISCLAIMER: These examples use techniques that I actually employ in the real world to deal with real problems. They might be wrong or dangerous. They might be inefficient. If you try them yourself, it might cause damage or irreparable loss. I take no responsibility for anything you do based on my examples or the information that I provide here.A common and befuddling problem with computers is the sudden and seemingly inexplicable disappearance of an external hard drive that has been functioning properly. It can be a breathtaking experience to suddenly be told that your data, often irreplaceable pictures and documents, might be gone forever.
As with many similar situations in life the appropriate response is “Don’t panic”. When approached sensibly and carefully, the situation can be resolved and the data saved more times than not. Here we will look at the causes, fixes and preventative measures for instances involving external drives being used with Windows XP and Windows Vista/7.
Error Messages
Common error messages associated with the sudden inability to access an external hard disk drive.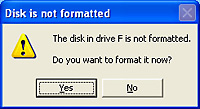 |
 |
| Windows XP | Windows 7 |
| DO NOT FORMAT THE DRIVE | |
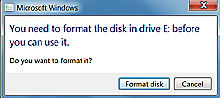
When attempting to access the drive in Windows you may see a message asking you to format the drive DO NOT FORMAT THE DRIVE
You need to format the disk in drive before you can use it.

Do you want to format it?
Another error that you may see when trying to access the drive in Windows from a program or the command line is…
This volume does not contain a recognized file system. Please make sure that all required file system drivers are loaded and that the volume is not corrupted.
Attempting to run chkdsk in an attempt to repair the problem will give an error also…
chkdsk can not be run on the drive

The type of the file system is RAW.

CHKDSK is not available for RAW drives.
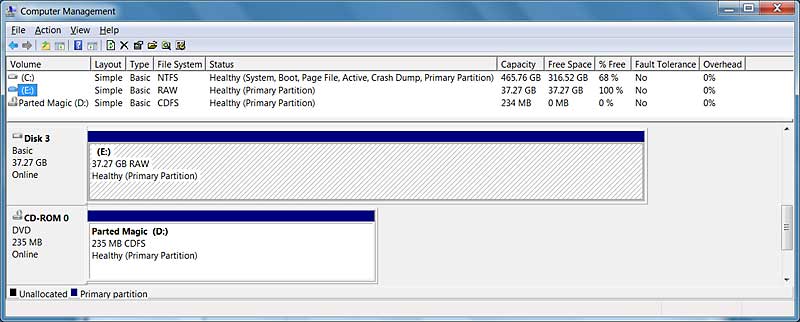
The Disk Management window shows the partition as either RAW or without a filesystem type.
| Properties of the drive show that both used and free spaces are 0 byte in size for the raw drive | |
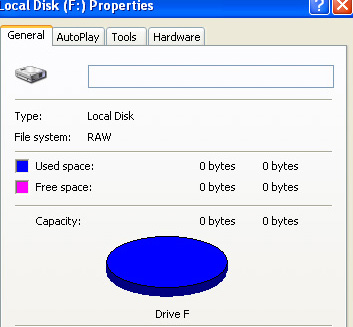 |
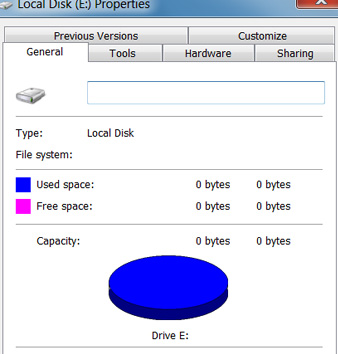 |
| Windows XP | Windows 7 |
What does RAW partition mean
A RAW filesystem simply means that it is a filesystem that is not recognized by Windows. Therefore all the available filesystem drivers are unable to mount the filesystem as a drive. This often happens when the records determining the filesystem type or location on the disk are damaged or corrupted, usually the partition table or the boot sector.Since Windows sees no filesystem in the partition, it prompts you to format it in order to create a filesystem on it. DO NOT FORMAT IT.
Why does it happen and how to avoid it
The most common cause of external hard drives suddenly becoming RAW drives is if they are disconnected from a computer without using the “Safely Remove Hardware” option. This can happen in many ways such as a power failure, unplugging the drive from the USB port or from its AC adapter, a problem with the computer that causes it to temporarily disconnect the USB hubs and many more circumstances can lead to this occurring.Always use “Safely remove hardware” to disconnect the drive. Left click the icon on the taskbar, select the device from the menu, and wait for the confirmation message.
How do you fix it
For this example, I chose the most heavily damaged disk with this issue that I could find in my collection of damaged disks. It has both of the most common problems. The partition table is corrupted and the boot sector of the main partition is also scrambled. The pictures of error messages above all came from this drive. The pictures of the repair process below are from the actual repair of this drive. Some images are from a virtual machine (simply to make it easier to get the screenshots) and some are from an actual desktop. This is a real repair not a manufactured example.Before proceeding beyond this point, you need to be aware of the risks involved. If the problem with the drive is not simply a logical error but is a manifestation of physical damage then the more you use it and try to repair, the worse the damage may become. To minimize the risks, the drive can be taken to a professional who is experienced in this type of repair. The drive should not be making strange clicking or beeping noises. That means that there is definitely physical damage and it should be sent to a facility with the proper tools and environment to repair/recover it since trying to repair it as described in this post can make that situation worse. If you wish to continue on your own there are three important rules to remember.
1. Computer problems are variable. You may very well come up with a different situation than I outline below. Make sure that you stop and think things through carefully when the process becomes different than I describe.
2. You DO NOT WANT TO WRITE ANYTHING TO THE RAW DRIVE except for the repaired MBR and repaired Boot Sector if necessary. Any other writing can overwrite data on the drive that you would want to keep.
3. This repair does not apply to solid-state drives (SSD). They are very different than normal drives and can erase important data on a RAW partition just by connecting power to them.
Do you want to recover anything extra important first?
This step is optional and does not always work. EDIT 1/22/2013It can put your mind at ease and make the process less stressful if you can successfully and quickly make copies of the most important files on the drive. After making sure that these files are safely copied to another drive, you can continue with repairing the drive with a much more relaxed demeanor and thus be less likely to make a mistake.
Often you can access the data on the missing drive by booting with a Linux LiveCD. The hard disk drive being used in this example is too damaged to do this but there is another article with instructions here that uses a drive that while not visible in Windows was accessible with a Linux LiveCD.
Repair partition table and boot sector
In order to repair the most common problems that cause an external disk to suddenly become RAW we will use a PartedMagic Linux boot CD and one of the tools included on it called TestDisk. Both of these items are free and I urge you to donate to them if you are helped by their use and have the ability to make a donation.
This method allows us to work on the drive without attempting to mount it and gives us more direct access to it than trying to fix it in Windows.
First make a bootable CD or USB stick of PartedMagic. Instructions can be found here.
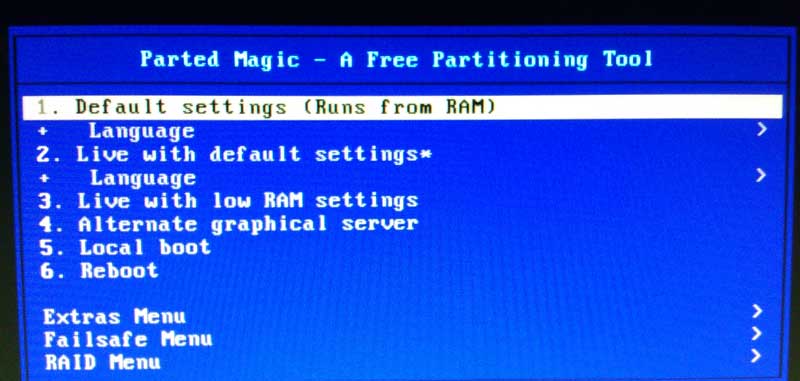
Boot the computer that has the bad drive connected to it with the PartedMagic CD/USB that you made. A menu will pop up, please select
1. Default Settings (Runs from RAM)
When it finishes booting you will notice that it looks kind of like a Windows desktop. The button in the lower left works like the START button in Windows XP and allows you to select and run various programs or shutdown the computer. To make things easy, I’ll just refer to this as the START button.
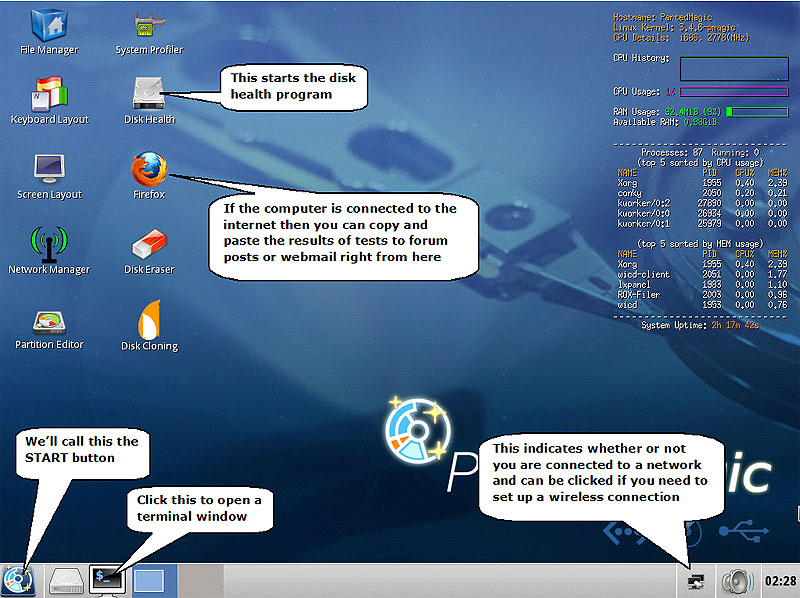
Click on the Terminal button down near the START button (It has a picture of a monitor on it) and type
testdisk
and press enter.
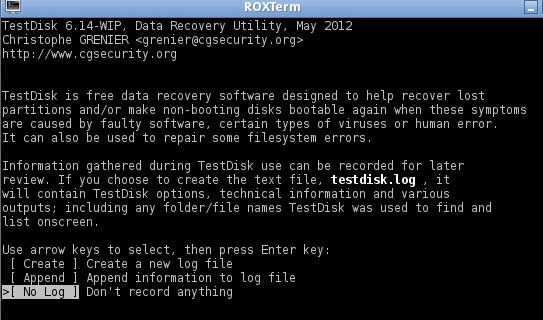
TestDisk is a console application so you have to use your keyboard to interact with it instead of your mouse.
Choose No Log and hit enter
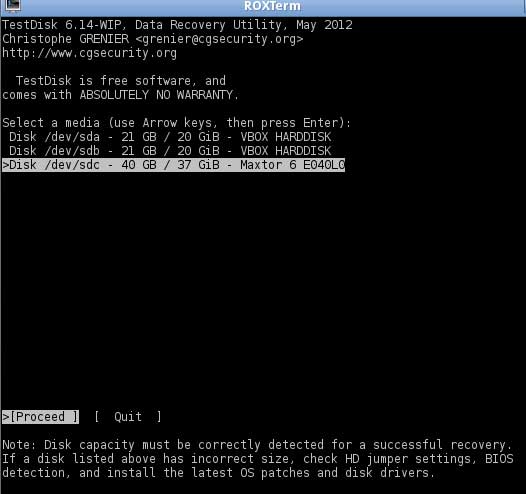
Make sure that your external disk is highlighted
Choose Proceed and hit enter
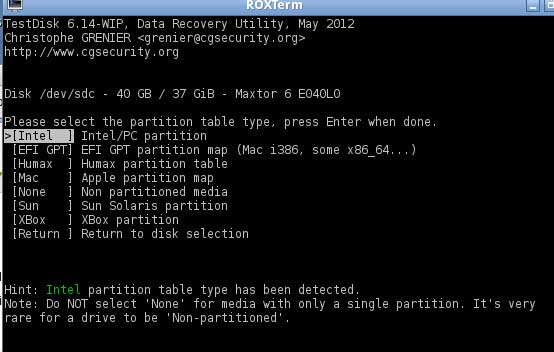
Select Intel and hit enter (there is a slight chance that the partition is EFI GPT if the drive is 2TB or greater in size and at the bottom of this screen it says that Hint: EFI GPT was detected. If that is the case, select EFI GPT instead and try that.)
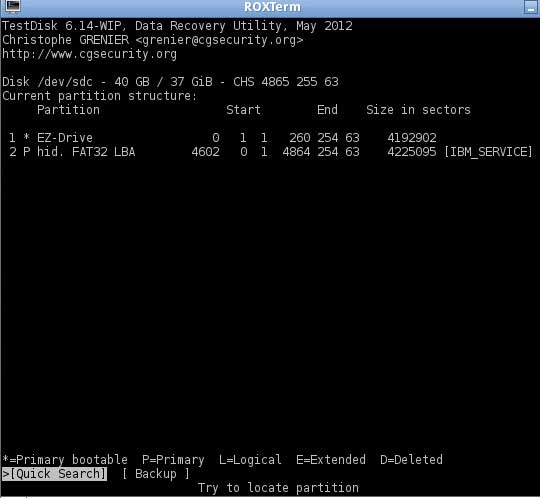
Select Analyse and hit enter

The partition data looks incorrect (an explanation of why is beyond the scope of this article)
Select Quick Search and hit enter
Say ‘Y‘ if it asks if the disk was made in Vista/Win7 (even if it was made in XP say ‘yes’)
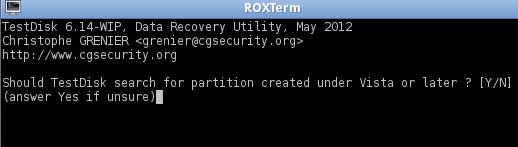
Now the Quick Search will run
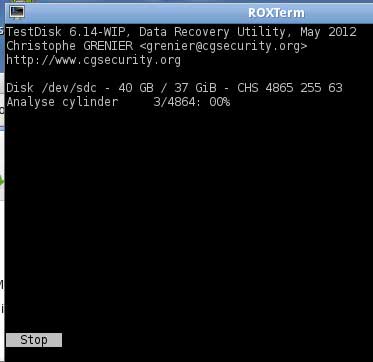
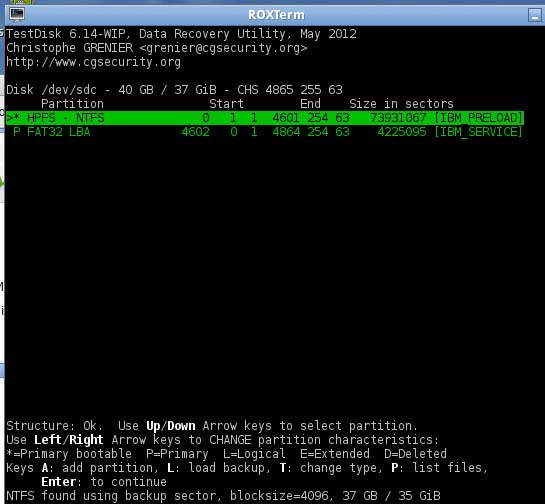
When the Quick Search completes, we see one partition (if you only see the option to CONTINUE at the bottom of the screen press ENTER one time to continue to the screen that you need to be at).
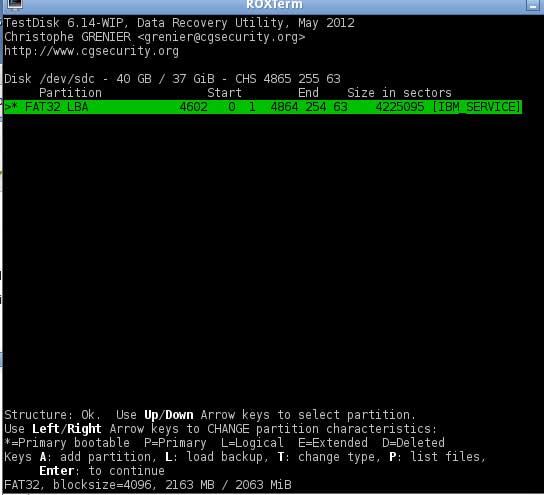
Lets look at the data on that partition press
P
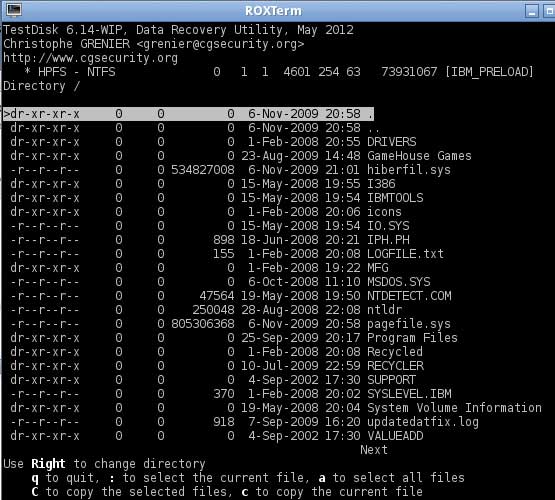
and you should see a list of files/folders in the partition.
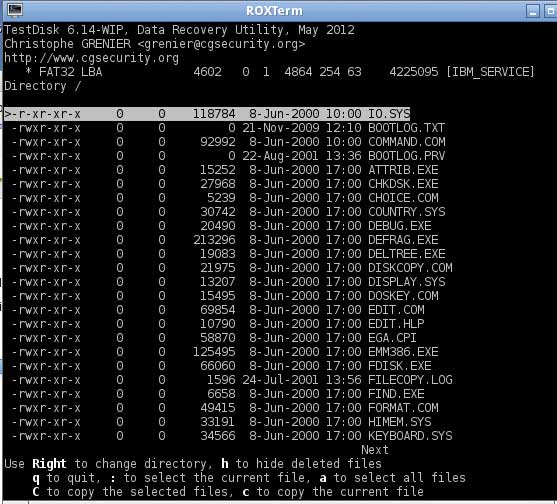
Hmmm… This looks like a bunch of diagnostic tools but not our missing data. We’ll need to look further. Press
Q
to go back a screen and then press
enter
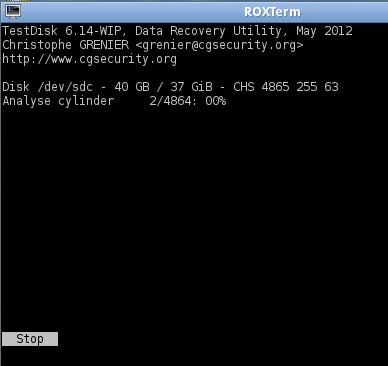
To get to this screen, select DEEPER SEARCH and press enter.

Naturally, the Deeper Search takes longer than the Quick Search
When the Deeper Search completes we now see two partitions. The one we saw after the quick search and another one.
Select the new partition and press
P
to see the files/folders and now we see the data we want to make visible again.
Press
Q
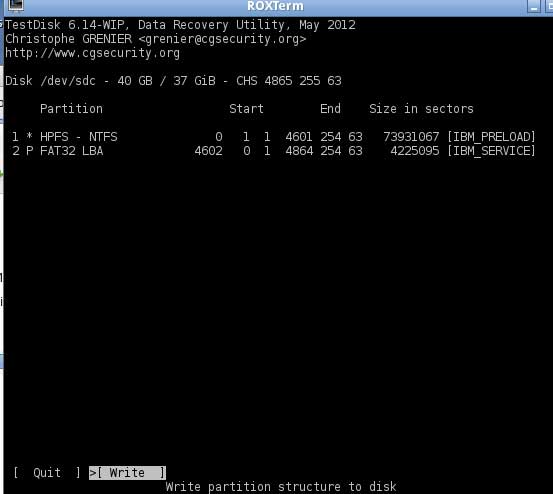
to go back a screen and then press enter to get to this screen.
Select WRITE and press enter in order to write our new partition table to the drive.
DO NOT WRITE A NEW PARTITION TABLE IF YOU DID NOT SEE YOUR FILES/FOLDERS That means the proper partition table was not found and you will have to try a different technique to recover your data.
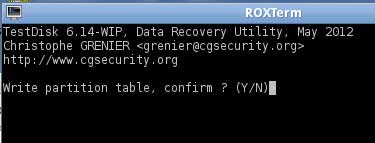
Press Y to confirm that you want to write the new partition table.
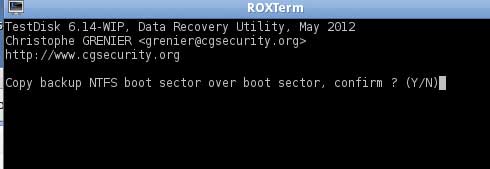
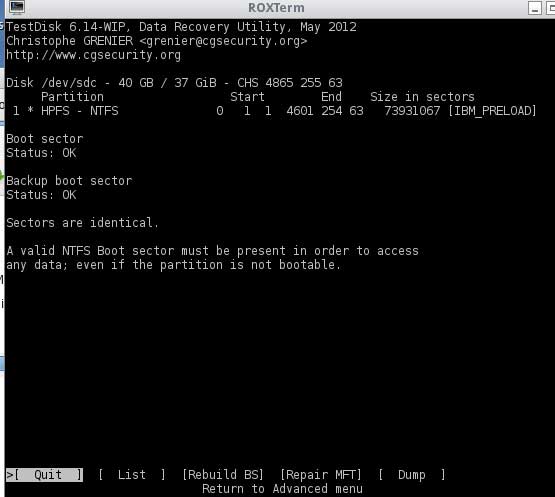
As I mentioned at the start of this repair, this disk also has corruption in the boot sector of the partition that we are trying to make visible again. When this is the case TestDisk will stop at this point and ask you to fix it before it finishes writing the new partition table. If the backup boot sector is good (as in this case) simply choose BACKUP BS and press enter. In the event that the backup boot sector is also bad then choose REBUILD BS.

Press Y to confirm the boot sector repair
Then choose QUIT and press enter
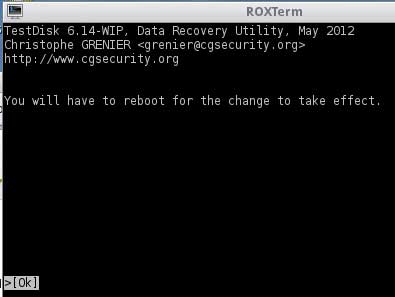
Regardless of whether a boot sector repair is required or not, you will end up at this screen where all you can do is press enter. Then hit Q until you are out of TestDisk.
Now remove the PartedMagic CD and shutdown the computer START>SHUTDOWN and then try booting it into Windows to see if the drive is now visible.
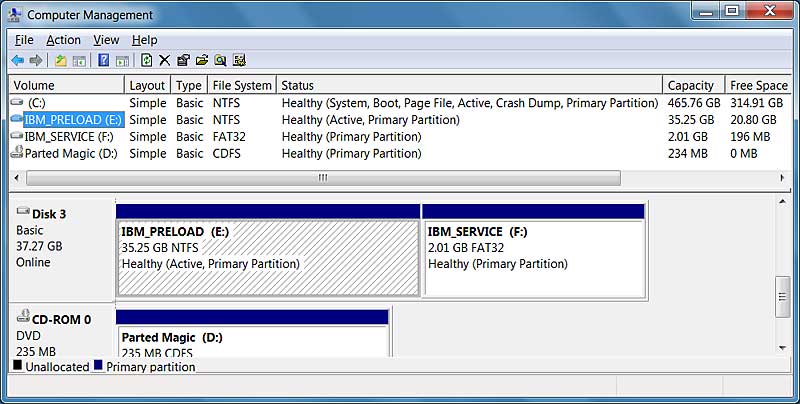
Here are the results for the drive used in this example…


Backup important files and run chkdsk
Now you should make backups of all important files on the drive in case it goes bad again and then run chkdsk to fix any other filesystem errors that may still exist.
After backing up important files, right-click the disk in Windows Explorer and choose PROPERTIES. Go to the TOOLS tab and click CHECK NOW. Check both options and click START.
Hopefully, this solves your problem. Please feel free to contact me through the contact form or comments if you have any questions or suggestions for this post.


